-
- My Homes
- My Tours
- My Favorites
- My Searches
- Sign In
- Register
Why Panorama Photo Editing? A Complet Guide
by ppe
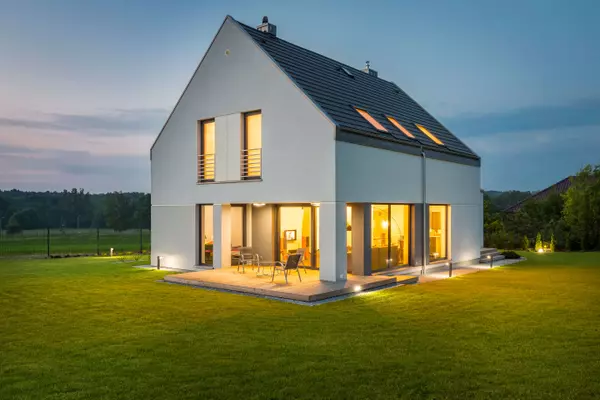
Property buyers rarely visit a site first anymore. They browse listings, compare visuals, and decide within seconds whether a property deserves attention. That’s why panoramic photography has become a powerful tool in real estate marketing. It shows space, layout, and atmosphere in a way single-frame images simply can’t. In this Panoramic photo editing guide, I will discuss many important aspects related to Panorama photo editing.
But capturing a panorama is only half the job. Editing shapes the final impact. Clean stitching, natural colors, and balanced exposure make the difference between an ordinary listing and one that draws serious inquiries. This Panoramic photo editing guide walks you through the essentials of Panorama photo editing, with a focus on real estate needs and current visual quality standards.
Why Panorama Editing Matters in Real Estate
Industry reports from the National Association of Realtors suggest over 85% of buyers consider photos the most important factor when evaluating listings online. Meanwhile, marketing surveys indicate more than 70% of property professionals outsource some form of Real Estate Photo Editing to enhance presentation quality.
Panoramic visuals go even further:
-
They present entire rooms without distortion
-
They help buyers understand spatial relationships
-
They increase engagement on listing platforms
-
They support immersive virtual tour experiences
What this really means is simple: strong panoramic visuals translate into higher perceived property value.
Preparing Your Images Before Editing
Before jumping into editing software, good preparation saves hours of correction later.
Key preparation steps
-
Use consistent exposure while shooting multiple frames
-
Maintain level camera alignment to reduce distortion
-
Shoot in RAW format whenever possible
-
Ensure overlapping frames for clean stitching
When preparation is solid, Real Estate Panorama Image Editing becomes faster and more precise.
Choosing the Right Editing Software
Several professional tools support panorama editing. The choice depends on workflow, budget, and output needs.
Commonly used software
-
Adobe Lightroom and Photoshop
-
PTGui or Hugin for advanced stitching
-
Capture One for color accuracy
-
Specialized Panorama Photo Editing Services platforms
Many real estate firms partner with a dedicated Real Estate Panorama Photo Editing Company to maintain consistent branding across listings. That approach often saves time while ensuring professional standards.
Read Also- Top 5 Real Estate Video Editing Companies in the USA
Panorama Photo Editing Guide- Step-by-Step
1. Stitching the Frames
This is where multiple images become one seamless panorama.
Focus on:
-
Automatic alignment correction
-
Ghost removal for moving objects
-
Edge blending for smooth transitions
Poor stitching leads to visible seams or warped architecture, which immediately reduces buyer trust.
2. Correcting Perspective and Distortion
Wide panoramic shots can exaggerate angles. In property marketing, accuracy matters.
Use perspective correction tools to:
-
Straighten walls and ceilings
-
Remove lens distortion
-
Maintain realistic room proportions
Professional Real Estate Panorama Photo Editing always prioritizes architectural accuracy over dramatic effects.
3. Exposure and Color Balance
Interior real estate shots often combine window light and artificial lighting. Without careful correction, colors look inconsistent.
Adjust:
-
Exposure blending for bright windows
-
Contrast for clarity without harsh shadows
According to property marketing studies, listings with well-balanced lighting receive noticeably higher engagement rates.
4. Detail Enhancement and Sharpness
Clarity signals professionalism.
Focus on:
-
Moderate sharpening for furniture textures
-
Noise reduction in shadow areas
-
Highlight recovery to preserve outdoor views
Subtle enhancement works best. Over-processing makes images look artificial, which can backfire in real estate marketing.
5. Final Retouching
This step refines the overall presentation.
Common adjustments include:
-
Removing minor distractions
-
Correcting reflections
-
Enhancing sky visibility through windows
-
Ensuring consistent tone across multiple listing images
Many professionals outsource this stage to Panorama Photo Editing Services for consistency and speed.
Read Also- Real Estate HDR Photo Editing Tips
Real Estate-Specific Editing Tips
Editing panoramas for property listings isn’t the same as landscape photography. Buyers want clarity, not artistic abstraction.
Keep these principles in mind
-
Maintain true color representation
-
Avoid excessive HDR effects
-
Preserve architectural realism
-
Highlight spaciousness without distortion
When Real Estate Panorama Image Editing follows these principles, listings look credible and inviting rather than overly stylized.
Trends Shaping Panorama Photo Editing
Real estate visual marketing keeps evolving. Several trends are shaping how panoramas are edited today.
Current trends include
-
Virtual tour integration using 360 panoramas
-
AI-assisted object removal and sky replacement
-
HDR blending with natural color grading
-
Faster cloud-based editing workflows
Industry estimates suggest nearly two-thirds of premium property listings now include some form of panoramic or immersive imagery. That number continues to grow.
Should You Edit In-House or Outsource?
This question comes up often among developers and property agencies.
In-house editing works if:
-
You have trained staff
-
You maintain consistent photography standards
-
You need full creative control
Outsourcing works if:
-
You handle high listing volume
-
You want faster turnaround
-
You prefer predictable quality
Many agencies partner with a Real Estate Panorama Photo Editing Company to maintain a consistent visual identity while freeing internal teams for marketing strategy.
Common Mistakes to Avoid
Even experienced photographers sometimes slip on panorama editing.
Watch out for these issues
-
Over-saturated colors
-
Unrealistic perspective correction
-
Visible stitching lines
-
Excessive sharpening or HDR glow
-
Ignoring natural lighting balance
These errors reduce credibility and can affect buyer perception.
Conclusion
Panorama editing isn’t just a technical exercise. It’s a marketing decision. When done well, it transforms property visuals into persuasive storytelling tools. Buyers gain a realistic sense of space, developers present projects confidently, and agents stand out in competitive markets.
Investing time in proper Real Estate Panorama Photo Editing or working with experienced Panorama Photo Editing Services ensures listings look professional, trustworthy, and engaging. In a market where visuals often determine first impressions, that investment pays off quickly.
Frequently Asked Questions: Panorama Photo Editing Guide
1. What is panorama photo editing in real estate?
It involves stitching multiple images into a wide-angle view, correcting distortion, balancing lighting, and enhancing clarity so property spaces appear natural, spacious, and visually appealing.
2. Why are panoramic images important for property listings?
They show full room layouts, improve buyer understanding, increase online engagement, and create a stronger first impression compared to standard photos.
3. Can beginners handle Real Estate Panorama Image Editing?
Yes, basic stitching tools are user-friendly. However, professional-quality results usually require advanced editing skills or specialized Panorama Photo Editing Services.
4. How long does professional panorama editing take?
Depending on complexity, turnaround ranges from a few hours to 24 hours. Large agencies often rely on a Real Estate Panorama Photo Editing Company for quick, consistent output.
5. Does panorama editing improve property sales?
Indirectly, yes. High-quality visuals attract more inquiries, improve perceived property value, and increase buyer confidence during online browsing.
The post Why Panorama Photo Editing? A Complet Guide appeared first on Property Photo Editing.
Categories
Recent Posts