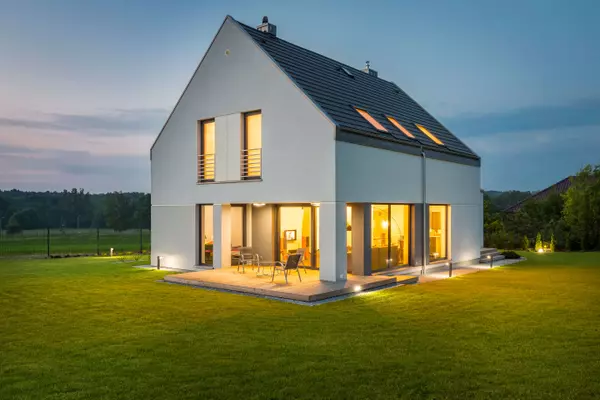
How to Fix the Most Common Real Estate Photo Editing Mistakes
In the competitive real estate market, high-quality property photos can make or break a sale. Buyers often decide whether to visit a property based on the first few images they see online. That’s why photo editing plays a vital role in real estate marketing. However, many professionals unknowingly make editing mistakes that can harm the property’s appeal rather than enhance it.
If you’re a real estate professional or business owner in the USA, understanding and fixing these common photo editing mistakes can help you present properties in the best possible light – without crossing the line into unrealistic imagery. Let’s explore the most common issues and how to fix them effectively.
Explore PPE’s Real Estate HDR Photo Editing Services to make your property stand out.
How to Fix the Most Common Real Estate Photo Editing Mistakes
1. Over-Saturation of Colors
One of the most frequent mistakes in real estate photo editing is over-saturating colors. While enhancing color contrast can make images pop, pushing it too far creates unnatural results. Bright grass that looks neon green or skies that appear overly blue can make potential buyers skeptical about the property’s true condition.
How to fix it:
Use color correction tools moderately. Aim for natural tones that reflect how the property looks in daylight. Calibrate your monitor to ensure color accuracy, and always compare edited photos with the original ones to maintain realism.
2. Incorrect White Balance
Improper white balance can make interiors look too warm (yellowish) or too cool (bluish), altering the property’s natural ambiance. This problem often arises from mixed lighting sources like daylight and artificial bulbs.
How to fix it:
Adjust the white balance during post-processing using tools like Lightroom or Photoshop. You can use the “eyedropper” tool to identify neutral tones (like white walls or ceilings) and balance the colors accordingly. For consistent results, shoot in RAW format – it gives more flexibility for color adjustments later.
3. Overuse of HDR Editing
High Dynamic Range (HDR) editing is great for balancing light and shadow, especially in rooms with large windows. However, too much HDR can lead to unnatural photos with flat contrast or a “halo” effect around objects.
How to fix it:
Blend multiple exposures carefully and avoid pushing the sliders to extremes. Maintain a balance between bright and dark areas to preserve natural lighting. Subtlety is key – the best HDR photos are the ones that don’t look like HDR at all.
4. Crooked or Misaligned Lines
A crooked horizon or slanted walls can subconsciously make buyers feel uneasy. This often happens when the camera isn’t perfectly level during shooting or due to lens distortion in wide-angle shots.
How to fix it:
Use the “straighten” or “transform” tools to align vertical and horizontal lines. In Photoshop or Lightroom, use the “Lens Correction” or “Upright” feature to correct perspective distortions. Always make sure floors, ceilings, and windows appear straight and symmetrical.
5. Over-Retouching Interiors
Many editors go overboard with retouching – removing every imperfection, changing wall colors, or adding unrealistic shine to furniture. While it might look appealing at first, overly edited images can mislead buyers and hurt credibility.
How to fix it:
Retouch only the essentials. Remove clutter, fix lighting inconsistencies, and enhance the natural features of the property. Avoid altering permanent features like flooring or wall finishes. The goal is to present the property at its best – not to create a fantasy version of it.
6. Ignoring Window Views
When editing indoor shots, many professionals fail to properly expose window views. The result? Bright, washed-out windows that lose the beautiful exterior scenery.
How to fix it:
Use exposure blending or HDR techniques to balance interior lighting with outdoor brightness. Another option is to replace the window view with a realistic outdoor image taken from the same location, but only if it reflects what buyers would actually see.
7. Poor Sky Replacements
Sky replacement is a popular trick to make exterior photos more appealing. However, adding an unrealistic blue sky or dramatic clouds can make the image look fake.
How to fix it:
Choose a natural-looking sky that matches the lighting direction and time of day. Avoid over-saturated or stock-style skies that clash with the property’s tone. Tools like Photoshop’s Sky Replacement feature or Luminar AI can help you create realistic transitions.
8. Uneven Lighting and Shadows
Unbalanced lighting can make some areas of the image look too dark while others appear overexposed. This usually happens in interiors with mixed light sources or when using flash improperly.
How to fix it:
Use layer masking to even out brightness levels. Adjust shadows and highlights separately instead of increasing overall exposure. If possible, use a tripod and take multiple exposures to merge in post-editing for balanced light distribution.
9. Ignoring Color Consistency
Inconsistent colors between different photos of the same property can confuse potential buyers. For example, if the living room wall looks beige in one image and white in another, it reduces the sense of continuity.
How to fix it:
Apply the same color correction settings across all photos of a property. Lightroom’s “sync settings” feature can help maintain consistency. Always double-check your images in sequence to ensure a uniform look and feel.
10. Neglecting Image Optimization for Web
Large image files can slow down your website, hurting user experience and SEO rankings. Many professionals forget to optimize their images before uploading them.
How to fix it:
Resize and compress images without losing quality. Use formats like JPEG or WebP and ensure dimensions fit your website layout. Tools like TinyPNG or Photoshop’s “Save for Web” feature can help you maintain clarity while reducing file size.
Final Thoughts
Real estate photo editing isn’t just about making pictures look pretty – it’s about creating a truthful yet attractive representation of a property. When done correctly, editing enhances a home’s best features and draws in potential buyers. But when overdone, it can backfire.
By fixing these common real estate photo editing mistakes, you’ll produce images that look professional, credible, and persuasive – giving your listings a stronger competitive edge in the U.S. property market.
FAQs on Common Real Estate Photo Editing Mistakes
1. What are the most common real estate photo editing mistakes?
Over-saturation, poor white balance, uneven lighting, and overuse of HDR are some of the most common mistakes that make property photos look unnatural.
2. How can I make my real estate photos look natural after editing?
Use balanced color correction, proper exposure, and avoid over-retouching. Always compare your edits with the original image to maintain a realistic appearance.
3. Why is white balance important in real estate image editing?
Correct white balance ensures accurate color tones and natural lighting, making interiors look inviting and true to life.
4. Can over-editing hurt real estate marketing?
Yes. Over-editing can make photos look fake and mislead buyers, damaging trust and credibility. Keep edits subtle and professional for the best results.
The post How to Fix the Most Common Real Estate Photo Editing Mistakes appeared first on Property Photo Editing.
Categories
Recent Posts