10 Proven Real Estate Photography Tips to Make Your Listings Stand Out
When it comes to selling a property in the competitive U.S. housing market, first impressions matter more than anything. And guess what? That first impression often happens online. According to the National Association of Realtors, over 95% of buyers browse listings on the internet before ever stepping foot in a home. That means the quality of your listing photos can make or break a deal. So, how do you make sure your property stands out from thousands of listings? The answer lies in professional-quality photography. With the right techniques, even an ordinary home can look extraordinary. Let’s dive into proven Real Estate Photography tips to make your listings stand out.
Explore our Real Estate Image Blending Services to make your property appealing.
Proven Real Estate Photography tips to make your listings stand out.
Here are the tips by experts to make your property lisiting stand out from others.
1. Use the Right Equipment
While smartphone cameras have come a long way, investing in a DSLR or mirrorless camera with a wide-angle lens will instantly elevate your photos. A wide-angle lens helps capture the entire room, making spaces look larger and more inviting. For the best results, a tripod is also a must- it ensures stability and consistency in every shot.
2. Shoot in Natural Light
Nothing beats the glow of natural light for real estate photography. Schedule shoots during the daytime, preferably mid-morning or late afternoon when light is soft and flattering. Open curtains and blinds to allow sunlight in, but avoid shooting directly into bright windows as it may cause overexposure.
3. Declutter and Stage the Space
A cluttered room instantly turns buyers off. Before you snap a photo, remove personal items, excessive décor, and unnecessary furniture. Staging the space with neutral, modern touches can make the home feel more appealing. Think fresh flowers, clean countertops, and neatly arranged furniture.
4. Focus on Key Selling Points
Every property has unique features- maybe it’s a cozy fireplace, a stunning kitchen island, or a spacious backyard. Highlight these focal points in your photos. Don’t just capture wide shots of every room; zoom in on the details that make the property special.
5. Master the Angles
Angles matter. Shooting from chest height with a wide-angle lens creates a natural and balanced perspective. Avoid tilting the camera too much, as it can distort lines and make rooms look unnatural. Taking photos from the corners of rooms can also help showcase the full depth and size of the space.
Read Also- Role of AI in Real Estate Photo Enhancement
6. Keep Everything Straight
Crooked photos are a big no-no in real estate. Always make sure vertical and horizontal lines, such as walls, windows, and countertops, look straight in your images. A tripod with a leveling tool or editing software can help fix alignment issues.
7. Use HDR for Balanced Lighting
In real estate photography, lighting can be tricky- especially when a room has both bright windows and darker corners. HDR (High Dynamic Range) photography combines multiple exposures into one photo, balancing light and shadows perfectly. This technique ensures your pictures look natural and evenly lit.
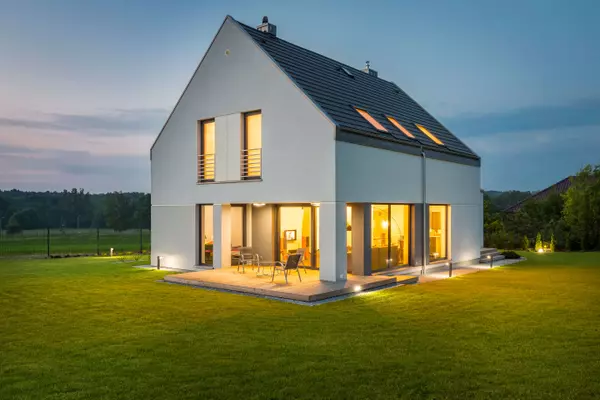
8. Don’t Forget the Exterior Shots
Curb appeal counts. The first image buyers usually see is the exterior of the property. Take photos of the front, backyard, and any outdoor features like a pool, patio, or garden. Make sure the lawn is trimmed, the driveway is clear, and the exterior looks fresh and inviting.
9. Edit Like a Pro
Even the best photos can use a little polishing. Use editing software like Lightroom or Photoshop to adjust brightness, contrast, sharpness, and color balance. However, avoid over-editing- buyers want realistic photos, not something that looks like it belongs in a magazine. Authenticity builds trust.
10. Prioritize Quality Over Quantity
More photos don’t always mean better. A well-curated set of 20-30 high-quality images is more effective than 60 mediocre ones. Make sure your photo gallery flows logically- start with exteriors, then move through the main living areas, bedrooms, bathrooms, and finally the backyard or unique features.
Final Thoughts: Real Estate Photography Tips
Great photography is not just about capturing a property—it’s about creating a vision for potential buyers. When done right, your listing photos can spark interest, encourage more viewings, and even help homes sell faster and at higher prices. By following these 10 proven tips, you can make sure your real estate listings stand out in the crowded U.S. market.
FAQs: Real Estate Photography Tips
Q1. Why is real estate photography so important in the U.S. market?
Real estate photography is crucial because most buyers begin their search online. High-quality photos help listings grab attention, build trust, and attract more serious buyers. In many cases, professional photos can help a property sell faster and for a better price.
Q2. Do I need professional equipment for real estate photography?
While you can start with a good smartphone, professional cameras with wide-angle lenses and tripods deliver significantly better results. For agents serious about marketing, investing in the right gear or hiring a professional photographer is worth it.
Q3. Can photo editing make a big difference in real estate listings?
Yes, editing plays a huge role in real estate photography. It enhances lighting, colors, and overall presentation without misleading buyers. Professional editing ensures your listing looks polished, inviting, and competitive.
The post 10 Proven Real Estate Photography Tips to Make Your Listings Stand Out appeared first on Property Photo Editing.
Categories
Recent Posts